
County Line 25 Gallon Sprayer Manual: A Comprehensive Guide
This manual provides detailed instructions for the County Line 25-gallon sprayer, covering assembly, operation, maintenance, and safety.
Access parts diagrams and troubleshooting tips online for optimal performance and longevity of your sprayer.
The County Line 25-gallon sprayer is a versatile tool designed for a wide range of applications, from agricultural tasks to general property maintenance. This sprayer offers a substantial tank capacity, making it ideal for covering larger areas with fewer refills. It’s engineered for durability and ease of use, featuring a robust construction and user-friendly controls.
This manual serves as a comprehensive guide to ensure you can safely and effectively operate your sprayer. We’ll cover everything from initial assembly and setup to detailed operating instructions, routine maintenance procedures, and essential safety precautions. Understanding the features and proper usage will maximize the sprayer’s performance and extend its lifespan.
Resources like online parts diagrams (accessible via links such as nxfr5/County-Line-25-Gallon-Sprayer-Parts-Diagram) are available to assist with repairs and maintenance. Tractor Supply Co. also offers a range of replacement parts and accessories.
Understanding the Sprayer’s Key Features
The County Line 25-gallon sprayer boasts several key features designed for efficient and reliable operation. Its 25-gallon tank minimizes refill frequency, increasing productivity. The robust frame and wheels provide stability and maneuverability across various terrains. A key component is the adjustable nozzle, allowing users to customize spray patterns for different applications – from a fine mist to a concentrated stream.
The sprayer incorporates a hand-operated pump mechanism, delivering consistent pressure for even coverage. Durable hoses and wands ensure long-lasting performance. Access to parts diagrams, like those found at nxfr5, is crucial for understanding component functionality.
Furthermore, the sprayer’s design prioritizes ease of maintenance, with readily accessible filters and nozzles for cleaning and replacement. Tractor Supply Co. stocks various accessories to enhance functionality and address specific needs.

Assembly and Setup
Proper assembly is crucial for safe and effective operation. This section details unboxing, parts inventory, handle/wheel attachment, hose connection, and tank filling procedures.
Unboxing and Parts Inventory
Carefully unpack the County Line 25-gallon sprayer, ensuring all components are present and undamaged. Begin by inspecting the shipping carton for any visible signs of impact or punctures. Once opened, lay out all parts on a clean, protected surface. Refer to the included parts list to verify you have received everything necessary for complete assembly.
The standard package should include the sprayer tank, a spray wand, a high-pressure hose, the handle assembly, two wheels, nozzles of varying types, a filter, and any necessary hardware like bolts and washers. Compare the physical parts with the diagram found online at resources like nxfr5/County-Line-25-Gallon-Sprayer-Parts-Diagram.
If any parts are missing or damaged, immediately contact Tractor Supply Co. customer support or the retailer where you purchased the sprayer. Do not attempt to assemble the sprayer with missing or compromised components, as this could lead to malfunction or safety hazards. Keep the packaging materials until assembly is complete and you’ve confirmed all parts are accounted for.
Attaching the Handle and Wheels
Begin by attaching the handle assembly to the sprayer tank using the provided bolts and washers. Ensure the handle is securely fastened, providing a comfortable and stable grip for maneuvering the sprayer. Tighten the bolts firmly, but avoid over-tightening, which could damage the tank or handle mount.
Next, install the wheels. Align the wheel axles with the designated slots on the sprayer tank base. Push the wheels onto the axles until they click into place or are secured with retaining clips (if included). Verify the wheels rotate freely and are properly aligned for smooth rolling.
Double-check all connections to ensure the handle and wheels are firmly attached before proceeding. A wobbly handle or improperly installed wheels can compromise stability and make the sprayer difficult to operate safely. Refer to online parts diagrams for visual guidance during this assembly process.
Connecting the Hose and Wand
Begin by securely attaching the sprayer hose to the outlet port on the sprayer tank. Ensure a tight connection to prevent leaks during operation. Hand-tighten the connector initially, then use pliers or a wrench for a final, secure fit – avoid over-tightening.
Next, connect the wand assembly to the other end of the sprayer hose. Align the connectors and twist firmly until they lock into place. Verify the wand swivels freely and the trigger mechanism operates smoothly. Inspect the connections for any signs of damage or wear.
Before filling the tank, briefly test the hose and wand connection by running water through the system. This confirms a leak-free seal and ensures proper functionality. Refer to the parts diagram online to correctly identify and connect all components. A secure connection is vital for efficient and safe spraying.
Filling the Tank – Best Practices
Always position the sprayer on a level surface before filling to ensure accurate mixture ratios and prevent spills. Utilize a funnel to carefully pour the desired chemical concentrate into the tank, avoiding direct contact with skin or eyes. Fill the tank approximately three-quarters full with water, then add the concentrate according to the manufacturer’s instructions.
After adding the concentrate, top off the tank with the remaining water, leaving some space for agitation. Thoroughly mix the solution by either using the sprayer’s built-in agitator (if equipped) or manually stirring with a clean paddle. Regular agitation is crucial for maintaining a consistent spray mixture.
Avoid overfilling the tank, as this can lead to spillage during operation. Always check for leaks around the hose and wand connections before commencing spraying. Refer to the safety precautions section for proper handling of chemicals.

Operation and Usage
Proper operation ensures effective application. Prime the sprayer, adjust the nozzle, and utilize consistent spraying techniques for optimal coverage and chemical distribution.
Prime the Sprayer – Step-by-Step
Priming is crucial for building pressure and ensuring consistent spray. Begin by ensuring the nozzle is closed or set to a low-pressure setting. Next, open the drain plug located at the bottom of the tank to release any trapped air.
Pump the handle vigorously, observing the pressure gauge. Continue pumping until the gauge reaches the desired pressure, typically between 20-30 PSI, but consult your specific chemical label for recommendations.
As you pump, check for leaks around connections. If leaks are present, tighten the fittings. Once the pressure is stable, close the drain plug securely. Test the spray pattern by briefly opening the nozzle; a steady stream indicates successful priming. If the spray is uneven or weak, repeat the pumping process until a consistent flow is achieved. Regular priming before each use maximizes sprayer efficiency.
Adjusting the Nozzle for Different Applications
The County Line 25-gallon sprayer’s nozzle offers versatile spray patterns. For broad coverage, like lawns, utilize a fan nozzle setting, adjusting the angle for wider or narrower distribution. Herbicide applications often benefit from a coarser spray to minimize drift; select a nozzle that produces larger droplets.
Insecticide spraying may require a finer mist for thorough coverage of plant surfaces. Rotate the nozzle ring to switch between these patterns. Always consider the target area and chemical label recommendations when choosing a nozzle type.
Pressure also impacts spray characteristics; higher pressure yields smaller droplets and increased range, while lower pressure creates larger droplets and reduced range. Experiment with nozzle settings and pressure to achieve optimal results for each task, ensuring effective and targeted application.
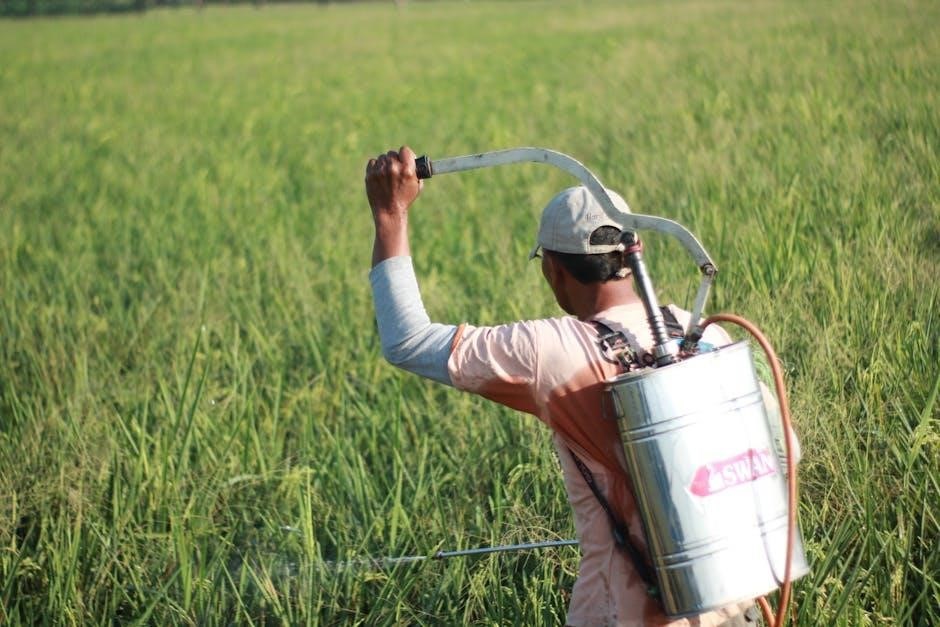
Spraying Techniques for Optimal Coverage
Achieving optimal coverage with your County Line 25-gallon sprayer requires consistent technique. Maintain a steady walking pace and an even distance from the target area, typically 2-3 feet, to ensure uniform application. Overlap each spray pass by approximately 25-50% to prevent gaps and streaks.
When spraying foliage, aim for both the upper and lower leaf surfaces, as pests and diseases often reside on both sides. Avoid spraying on windy days to minimize drift and off-target application. Use a sweeping motion with the wand, keeping the nozzle at a consistent height.
For larger areas, consider breaking the task into smaller sections to maintain focus and prevent fatigue. Regularly check for clogs and adjust pressure as needed to maintain a consistent spray pattern.
Maintaining Consistent Pressure
Consistent pressure is crucial for effective and even spraying with your County Line 25-gallon sprayer. Regularly monitor the pressure gauge during operation and adjust the pump handle as needed to maintain the desired PSI, typically between 30-60 PSI depending on the nozzle and application.
Avoid rapid or jerky pumping motions, as this can cause pressure fluctuations. A smooth, steady pumping rhythm will deliver a more consistent spray. If pressure drops unexpectedly, check for leaks in the hose, wand, or connections. Ensure the filter is clean, as a clogged filter can restrict flow and reduce pressure.
Periodically prime the sprayer to remove any air bubbles that may be affecting pressure. Consistent pressure ensures optimal droplet size and coverage.

Maintenance and Troubleshooting
Regular maintenance extends the life of your County Line 25-gallon sprayer. This section details cleaning, part replacement, common issue solutions, and proper winterization procedures.
Cleaning the Sprayer After Each Use
Thorough cleaning after every use is crucial for maintaining the County Line 25-gallon sprayer’s performance and preventing damage. Begin by emptying the tank completely, ensuring no residual chemicals remain. Rinse the tank with clean water several times, agitating to remove any sediment or residue.
Next, disassemble the nozzle, filter, and wand; Clean these components individually with warm, soapy water, paying close attention to small openings that can become clogged. Use a soft brush to scrub away any buildup. Rinse all parts thoroughly and allow them to air dry completely before reassembly.
Inspect the hose for any cracks or leaks and clean the exterior of the tank with a damp cloth. Proper cleaning prevents corrosion and ensures accurate application during future use, extending the sprayer’s lifespan and maintaining optimal functionality.
Replacing Nozzles and Filters
Regularly replacing nozzles and filters is essential for consistent sprayer performance. Over time, nozzles can wear, altering spray patterns, and filters become clogged, reducing flow. To replace a nozzle, unscrew the old one using appropriate pliers, being careful not to damage the nozzle body. Screw in the new nozzle, ensuring a tight seal.
Filter replacement involves locating the filter housing, typically near the tank inlet. Unscrew the housing and remove the old filter. Clean the housing before inserting a new filter of the correct size and type. Secure the housing tightly to prevent leaks.
Always refer to the parts diagram to identify the correct replacement parts. Maintaining clean and functional nozzles and filters ensures optimal spray quality and prevents damage to the pump.

Troubleshooting Common Issues (Clogging, Leaks)
Clogging is a frequent issue, often caused by debris in the spray solution. First, turn off and depressurize the sprayer. Disconnect the nozzle and flush it with clean water; a small wire can help clear stubborn blockages. For leaks, inspect all connections – hose to sprayer, wand to hose, and around the tank fittings. Tighten connections or replace worn washers.
If the pump isn’t building pressure, check the filter for clogs and ensure the tank isn’t airtight (a vent is needed). Persistent leaks may indicate a cracked hose or damaged tank; replace these components immediately.
Always consult the parts diagram to identify the correct replacement parts. Regular maintenance minimizes these issues, ensuring reliable operation.
Winter Storage Procedures
Proper winterization is crucial to prevent damage from freezing temperatures. Begin by completely draining the tank, hose, and wand. Use the sprayer to pump out as much liquid as possible, then open all valves and nozzles. Consider adding a non-toxic RV antifreeze to the tank, pump a small amount through the system, and then expel it.
Remove the nozzle, filter, and any other removable parts, cleaning them thoroughly and storing them in a dry place. Inspect the hose for cracks or wear and replace if necessary. Store the sprayer indoors, ideally in a frost-free environment, covered to protect it from dust and debris.
Before next season, re-inspect all components and flush the system with clean water.

Parts and Diagrams
Locate detailed parts diagrams online to easily identify components for repair or replacement. Tractor Supply Co. and other sources offer comprehensive lists and schematics.
Locating Parts Diagrams Online
Finding the correct parts diagram for your County Line 25-gallon sprayer is crucial for maintenance and repairs. A primary resource is often the Tractor Supply Co. website, where you can search for “Countyline Ag Sprayer Parts” and navigate to available diagrams.
Additionally, searching online using specific keywords like “County Line 25 Gallon Sprayer Parts Diagram pdf free download” can yield results from various online repositories and forums. The repository ‘nxfr5/County-Line-25-Gallon-Sprayer-Parts-Diagram’ is a potential source.
Remember to verify the diagram matches your sprayer’s model number to ensure accuracy. These diagrams typically illustrate exploded views of the sprayer, clearly labeling each component. Utilizing these online resources will streamline the process of identifying and ordering replacement parts, keeping your sprayer in optimal working condition.
Identifying Common Replacement Parts

When maintaining your County Line 25-gallon sprayer, certain parts are more prone to wear and tear. Commonly needed replacements include nozzles, filters, hoses, and the wand assembly. Filters, essential for preventing clogging, should be checked regularly and replaced when dirty.
Nozzles wear out with use, affecting spray patterns, and are easily replaceable. Hoses can develop leaks or cracks, requiring replacement to maintain consistent pressure. The wand assembly, subject to frequent handling, may need repair or full replacement over time.
Tractor Supply Co. offers a range of Countyline Ag Sprayer Parts & Accessories. When ordering, always refer to your sprayer’s parts diagram to ensure compatibility and proper fit. Keeping these common replacement parts on hand minimizes downtime and ensures your sprayer remains operational.
Understanding the Parts List
The County Line 25-gallon sprayer parts list is a crucial resource for maintenance and repair. It details every component of the sprayer, assigned a unique part number for easy identification when ordering replacements. Diagrams accompany the list, visually illustrating the location and assembly of each part.
Accessing the parts list online, through resources like nxfr5/County-Line-25-Gallon-Sprayer-Parts-Diagram, is highly recommended. The list categorizes parts – tank components, pump assemblies, spray nozzles, hoses, and hardware – simplifying the search process.
Understanding the parts list allows for accurate ordering, preventing delays and ensuring compatibility. Familiarize yourself with the terminology and part numbers before undertaking any repairs. This proactive approach streamlines maintenance and extends the life of your sprayer;

Safety Precautions
Always wear appropriate personal protective equipment (PPE) when operating the sprayer and handling chemicals. Avoid electrical hazards and follow safe chemical handling guidelines.
Personal Protective Equipment (PPE)

Prioritizing safety begins with utilizing the correct Personal Protective Equipment (PPE) during all phases of sprayer operation. Essential items include chemical-resistant gloves, protecting your skin from direct contact with potentially harmful substances. Eye protection, such as safety glasses or a face shield, is crucial to prevent splashes or sprays from causing irritation or injury.
Wearing long sleeves and pants minimizes skin exposure, and appropriate footwear, like boots, safeguards your feet. A respirator might be necessary when handling concentrated chemicals or spraying in enclosed spaces – consult the chemical label for specific recommendations.
Regularly inspect your PPE for any signs of damage, such as tears or punctures, and replace items as needed. Properly cleaning and storing your PPE after each use extends its lifespan and maintains its effectiveness. Remember, PPE is your first line of defense against potential hazards.
Safe Handling of Chemicals
Always read and thoroughly understand the chemical label before mixing or applying any substance with your County Line 25-gallon sprayer. The label provides critical information regarding hazards, dilution rates, and necessary precautions. Never mix chemicals unless specifically instructed to do so by the manufacturer, as dangerous reactions can occur.
When diluting chemicals, always add the concentrate to water, never water to concentrate, to prevent splashing and potential exothermic reactions. Use a designated mixing container and avoid spilling any chemicals.
Transport chemicals securely to prevent leaks or spills, and store them in a cool, dry, well-ventilated area, away from children and pets. Dispose of leftover chemicals and empty containers according to local regulations. Be mindful of environmental impact and avoid contaminating water sources.
Avoiding Electrical Hazards
If your County Line 25-gallon sprayer includes an electric pump, strict adherence to electrical safety is paramount. Always inspect the power cord for damage before each use – do not operate if frayed or exposed wires are present. Ensure the power source matches the sprayer’s voltage requirements, and utilize a Ground Fault Circuit Interrupter (GFCI) outlet or extension cord when working outdoors.
Never operate the sprayer in wet conditions or submerge any electrical components in water. Avoid pulling the cord to disconnect the sprayer; instead, grasp the plug firmly.
Regularly check electrical connections for corrosion or looseness. If repairs are needed, disconnect the power supply and consult a qualified electrician. Do not attempt to modify the electrical system yourself. Prioritize safety to prevent shocks and ensure reliable operation.